How to Add Sparkle to Photos (Starlight Effect Guide)
Sparkle is what separates a nice photo of fairy lights from a photo that feels genuinely magical. When bright points of light bloom into delicate star flares, an ordinary evening shot turns into something cinematic, romantic and a little bit unreal.
This guide explains how to add sparkle to photos using a starlight effect: what the effect actually does, which images suit it, the exact settings to start from, and the mistakes that make sparkle look cheap instead of dreamy. No Photoshop skills required.
Try DreamyGlow Free Now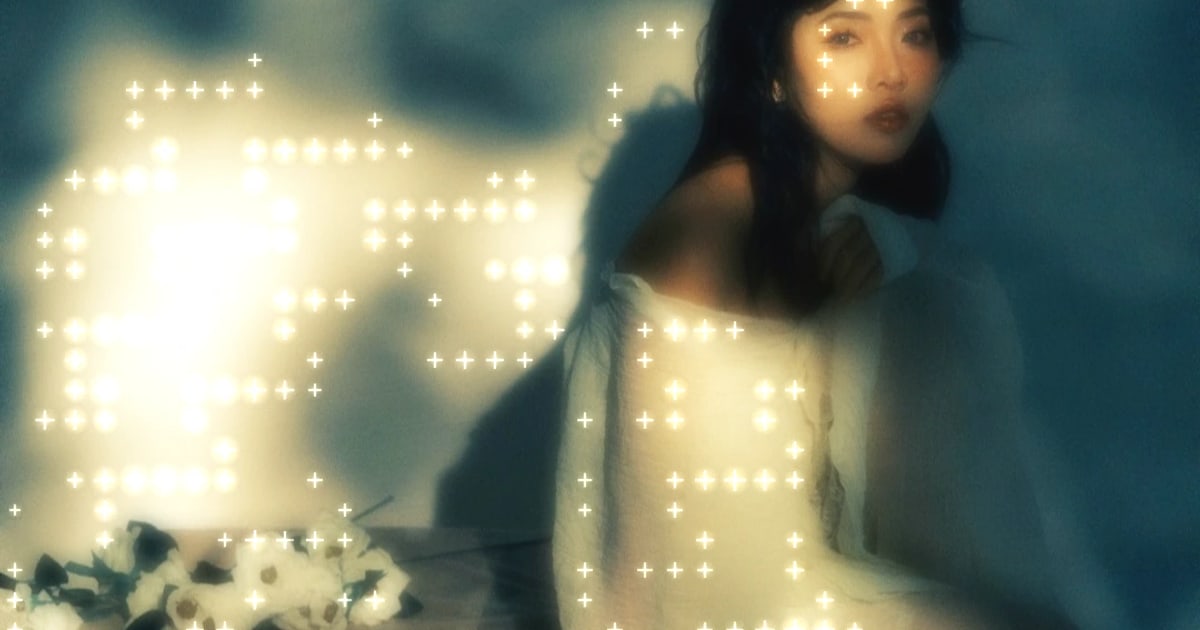
What Is a Sparkle (Starlight) Effect?
A sparkle effect takes the brightest points in your image and turns them into stars with radiating rays. Photographers have done this optically for decades using a star filter, a piece of glass etched with a fine grid that splits point light sources into streaks. The digital version works the same way, except you get to decide after the shoot how strong the effect should be.
Behind the scenes, a good starlight effect:
- Detects highlights above a brightness threshold, so only real light sources react instead of every pale pixel.
- Draws symmetrical rays outward from each of those points, typically four, six or eight per star.
- Adds a soft bloom around the core so the star has a glowing centre rather than hard lines.
- Optionally tints the rays and introduces a slight chromatic spread, which is what makes the sparkle read as light rather than as a drawn-on graphic.
The difference between a magical photo and a tacky one comes down to restraint. Real star filters only ever affect a few highlights, because a scene rarely contains dozens of intense point sources. Keeping that same logic in editing is the single most useful rule in this guide.
When to Use a Sparkle Effect
Sparkle needs something to sparkle on. Before you open any editor, ask whether the photo actually contains small, bright, well-separated highlights. If it does, the effect will feel natural. If it does not, no amount of slider tuning will save it.
- Fairy lights and candles – The classic use case. String lights, tealights and lanterns are small, bright and evenly spaced, which is exactly what star flares need.
- Weddings and engagements – Rings, sequins, champagne glasses, sparklers and reception lighting all respond beautifully, and the effect matches the romantic tone of the images.
- Night cityscapes – Street lamps, headlights and lit windows turn a flat night skyline into something that looks like a film still.
- Backlit portraits – Sun through leaves, hair rim light and background bokeh give you a handful of highlights to accent without touching the face.
- Water and snow – Sunlight on ripples, wet pavement after rain and fresh snow all produce specular glints that become convincing sparkles.
- Product and jewellery shots – A single well-placed star on a stone or a polished edge reads as quality rather than as a filter.
Photos that generally do not benefit: flat overcast scenes, evenly lit interiors, documents and screenshots, and any image where the brightest area is a large surface rather than a point. Those images usually want a softer treatment instead, which is covered in our guide on how to make photos look dreamy.
How to Add Sparkle to Photos Online, Step by Step
Building sparkle manually means painting stars on a new layer, setting the blend mode to screen, masking each one and matching the colour of the surrounding light. It works, but it takes fifteen minutes per photo. The Starlight Effect does the same thing in your browser in a few seconds.
Step 1 – Upload your photo
Open DreamyGlow and drop in the image you want to enhance. JPG, PNG and WebP all work, and processing happens locally in your browser, so nothing is uploaded to a server and full-resolution files stay fast.
Start from the best version of the photo you have. Sparkle amplifies highlights, so a shot that is already correctly exposed will give you clean stars, while a blown-out image gives the effect large white blobs to work with and the rays come out mushy.
Step 2 – Select the Starlight Effect
Choose Starlight from the effects list. You will see a live preview immediately, which matters more than it sounds: the right sparkle setting depends entirely on how many highlights your specific photo contains, so judging by eye beats copying numbers.
Browse the full effects library if you want to see how starlight compares with the other dreamy treatments before committing.
Step 3 – Set the intensity
Intensity controls how bright and prominent each star is. A 40–80% range covers most photos. Below 40% the effect is barely visible on screen and disappears entirely once Instagram compresses the image; above 80% the rays start to overwhelm the underlying scene.
A reliable method is to push intensity higher than you want, find the point where it clearly looks like too much, then pull back roughly a third. That final position is almost always the one you would have chosen anyway, and you get there faster than by creeping up from zero.
Step 4 – Tune the threshold so only real highlights react
The threshold decides how bright a pixel must be before it becomes a star. This is the control that separates a believable result from a glitter explosion.
- Too low – Skin highlights, pale fabric and bright sky pick up sparkles they should not have.
- Too high – Only one or two lights react and the effect looks accidental.
- Right – The lights you would point at if someone asked which parts of the scene are bright are exactly the ones that sparkle.
Raise the threshold until the sparkles on unimportant areas vanish, then stop. Everything else can be fixed with intensity.
Step 5 – Choose ray count, size and angle
These three settings define the personality of the sparkle.
- Ray count – Four rays give a clean, classic cross that suits weddings and portraits. Six feels more ornamental and works for festive scenes. Eight or more quickly reads as a graphic overlay, so use it deliberately.
- Size – Rays should stay comfortably shorter than the distance between neighbouring lights. Once stars from adjacent highlights overlap, the image turns into a web of lines.
- Angle – A slight rotation away from perfectly horizontal and vertical looks more organic, since a physical filter is rarely aligned to the frame exactly.
Step 6 – Match the sparkle colour to the scene
Pure white rays over warm tungsten lighting look pasted on. Tint the sparkle toward the colour of the light source it is coming from: warm amber for candles, string lights and golden hour; cool blue or silver for moonlight, snow and night city scenes; a hint of the dominant colour for neon.
Keep the tint subtle. You are nudging the rays toward the scene's palette, not colouring them in.
Step 7 – Layer with a soft glow, then export
Sparkle on its own can feel sharp against a clean digital image. Adding a small amount of soft glow underneath blends the star cores into the surrounding light and gives the whole frame a cohesive dreamy finish.
When you are happy, export at full quality. Star rays are thin, high-contrast lines, which is precisely the kind of detail aggressive compression destroys first. DreamyGlow downloads a full-resolution file ($1.99, or $7.99 lifetime) at original resolution, ready for social, a client gallery or print.
Recommended Sparkle Settings by Photo Type
Treat these as starting points rather than presets. The right numbers depend on how many highlights your frame contains and how large they are.
Wedding and couple photography
- Intensity around 50–65%, four rays, moderate size.
- High threshold so only candles, string lights and rings react, never skin or the dress.
- Warm tint to match reception lighting.
The goal is a few deliberate accents that support the moment. Faces should stay the brightest thing the eye lands on.
Night city and street scenes
- Intensity 60–80%, six rays for a slightly more dramatic look.
- Smaller ray size, because dense city lights sit close together and long rays merge into clutter.
- Cool or neutral tint, unless neon dominates.
This is where sparkle does the most work, turning an ordinary skyline into a cinematic frame.
Backlit and golden hour portraits
- Intensity 40–55%, four rays, generous size.
- Very high threshold so only the sun and the strongest bokeh highlights sparkle.
- Warm golden tint, paired with a light soft glow.
One large star on the sun behind your subject usually beats a dozen small ones scattered through the background.
Christmas, parties and festive scenes
- Intensity 55–70%, six rays, medium size.
- Moderate threshold, since tree lights are the subject and are supposed to sparkle.
- Warm tint, with a slight angle offset for variety.
Festive images tolerate more sparkle than any other category, but a decorated tree can still contain a hundred bulbs, so watch for overlapping rays.
Product and jewellery
- Intensity 45–60%, four rays, small size.
- Highest threshold available so a single specular glint reacts.
- Neutral or slightly cool tint for metals and stones.
Restraint matters most here. One precise star communicates shine; several communicate a filter.
Common Sparkle Mistakes (and How to Fix Them)
Almost every bad sparkle photo fails for one of these five reasons.
- Sparkles everywhere – The threshold is too low, so mid-tones are being treated as light sources. Raise it until only genuine highlights react, then re-check intensity.
- Rays overlapping into a mesh – Ray size is too large for how densely packed the lights are. Shorten the rays rather than reducing intensity; you keep the brightness and lose the clutter.
- Sparkle on faces and skin – Bright foreheads and catchlights are easy targets for a low threshold. Nothing ruins a portrait faster. Raise the threshold and, if the tool allows it, keep the effect away from the subject entirely.
- Stars that look pasted on – Usually a colour mismatch or a missing bloom. Tint the rays toward the light source and add a touch of soft glow so the star core melts into the highlight instead of sitting on top of it.
- Sparkle disappearing after upload – Social platforms recompress images and thin rays are the first casualty. Export at maximum quality, and if the effect vanishes on Instagram, add roughly 10% more intensity than looked right on your desktop.
One more habit worth adopting: step away from the image for a minute and come back to it. Sparkle is a strong effect and your eye adapts to it quickly, which is why edits that felt balanced during the session often look overdone the next morning.
Frequently Asked Questions About Sparkle Effects
Conclusion
Adding sparkle to photos comes down to three decisions: pick an image that already contains bright point lights, set a threshold high enough that only those lights react, and stop before the effect competes with your subject. Get those right and the sparkle reads as light rather than as editing.
Upload your photo and try the Starlight Effect to add magical flares in a few clicks, or explore the rest of the dreamy effects library to build your own signature look. If you want the full workflow around it, start with our guide on making photos look dreamy.